Bluetooth Keyboard on the Raspberry Pi

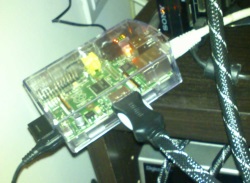
So I joined the hype and got myself a Raspberry Pi. I loaded it with RaspBMC and now I’ve got a nice little media center connected to my TV. All my music and pictures already reside on a NAS in the utility closet upstairs. I experimented with using my PS3 as a media center (too noisy and bad codec support) and with a DLNA capable blu-ray player (silent, but clumsy UI and also bad codec support), but nothing really worked that great. With the Raspberry, I now have a great front-end for my media collection. It’s silent (passively cooled) and runs every file I throw at it.
I planned to do some other stuff with this Raspberry, so I picked up this Bluetooth PS3 keyboard from a bargain bin and a Bluetooth dongle. Thinking that Bluetooth is a pretty well known these days, I thought pairing it with the Raspberry would be a piece of pie.

Boy, was I wrong. I don’t speak Linux and apparently Linux doesn’t really speak Bluetooth that well. Luckily, I speak Google pretty well and after an evening tinkering with obscure command line tools and strange text editors, I managed to get it to work.
So if anyone out there is struggling to get a Bluetooth Keyboard to work on the Raspberry Pi, here are the instructions to get it to work.
Step One: SSH
The first step is to connect to the Raspberry. Since I didn’t have a keyboard (duh!), I needed another way. This is where SSH comes in. SSH is basically Remote Desktop to the Linux console. Remote Console, actually. All you need is an SSH client like Putty, the IP address of your Raspberry and your login credentials.
At this point I realized that I didn’t really need a keyboard connected to the Raspberry to tinker with it. With SSH I could do anything I wanted to do that I thought I would need a keyboard for. But such details are not going to stop me from connecting this keyboard!
Step Two: Apt
Since the Raspberry Pi has no Bluetooth built-in, the Linux version that runs on it has no Bluetooth support baked in. This means you will need to install it yourself. Now Linux has this wonderful tool called Apt. Basically, Apt is the ‘Add and Remove Programs’ of the Linux world. In the console, just type:
sudo apt-get update
This will update a cache of all available programs and their dependencies. To download and install all the components needed to connect a Bluetooth keyboard to the Raspberry Pi, I had to enter:
sudo apt-get install bluez python-gobject
This will download and install both Bluez (a Linux Bluetooth stack and tools) and the python bindings for GObject (this is needed for the python scripts that power Bluez). For me, the installation failed with the following error message:
Service dbus has to be enabled to start service bluetooth
Now that is a great error message! Dbus is a way for applications to talk to another on Linux. Apparently this is needed, so I enabled this magic dbus this with
sudo update-rc.d -f dbus defaults
I re-ran the ‘apt-get install bluez python-gobject’ command and now Bluetooth was activated on my Raspberry Pi. You can check this by running the following command:
hcitool dev
This should return the location and the address of your Bluetooth Dongle.
Step 3: Pairing
Now we have to get this keyboard and this Bluetooth dongle to speak to each other. Set your keyboard in connection mode and type:
hcitool scan
Scanning will give you the address of the keyboard like this:
Scanning ...
    23:E4:87:4C:B3:A1       Wireless Keyboard
Copy this address because we will need it in the following steps of the process. We initialize the pairing between the Raspberry and the keyboard with this command:
bluez-simple-agent hci0 23:E4:87:4C:B3:A1
If everything goes well, you will be prompted to type a passkey with your keyboard:
DisplayPasskey (/org/bluez/14656/hci0/dev_23_E4_87_4C_B3_A1, 936319)
Your passkey is the number at the end of the line. Don’t forget to press ‘Enter’ after typing the passcode! Now your device is paired with the Raspberry Pi.
However, this command failed for me with a cryptic error message (‘Creating device failed: org.bluez.Error.AuthenticationRejected: Authentication Rejected’). Furiously googling brought me to a forum where they suggested to crack open a python script and change the word ‘KeyboardDisplay’ with ‘DisplayYesNo’. At this point I was ready to try anything, so I opened the script with this:
sudo nano /usr/bin/bluez-simple-agent
This will open nano, a command line text editor. I changed the one occurrence of ‘KeyboardDisplay’ with ‘DisplayYesNo’, closed the editor with ctrl-x (saving the file, of course) and tried the ‘bluez-simple-agent hci0 23:E4:87:4C:B3:A1’ command again. My keyboard was now paired to the Raspberry. I’m starting to like this Linux stuff…
Step 4: Trusting & Connecting
The final stage is making sure that the raspberry will automatically connect to the keyboard when it is turned on. This is called ‘trusting’ and is invoked by this command:
bluez-test-device trusted 23:E4:87:4C:B3:A1 yes
After trusing it, all you need to do is connect to it:
bluez-test-input connect 23:E4:87:4C:B3:A1 yes
Right now I can turn on my keyboard and it will ‘just work’ on my raspberry. It was a bit more work than I anticipated, but I learned a lot while figuring it out.
